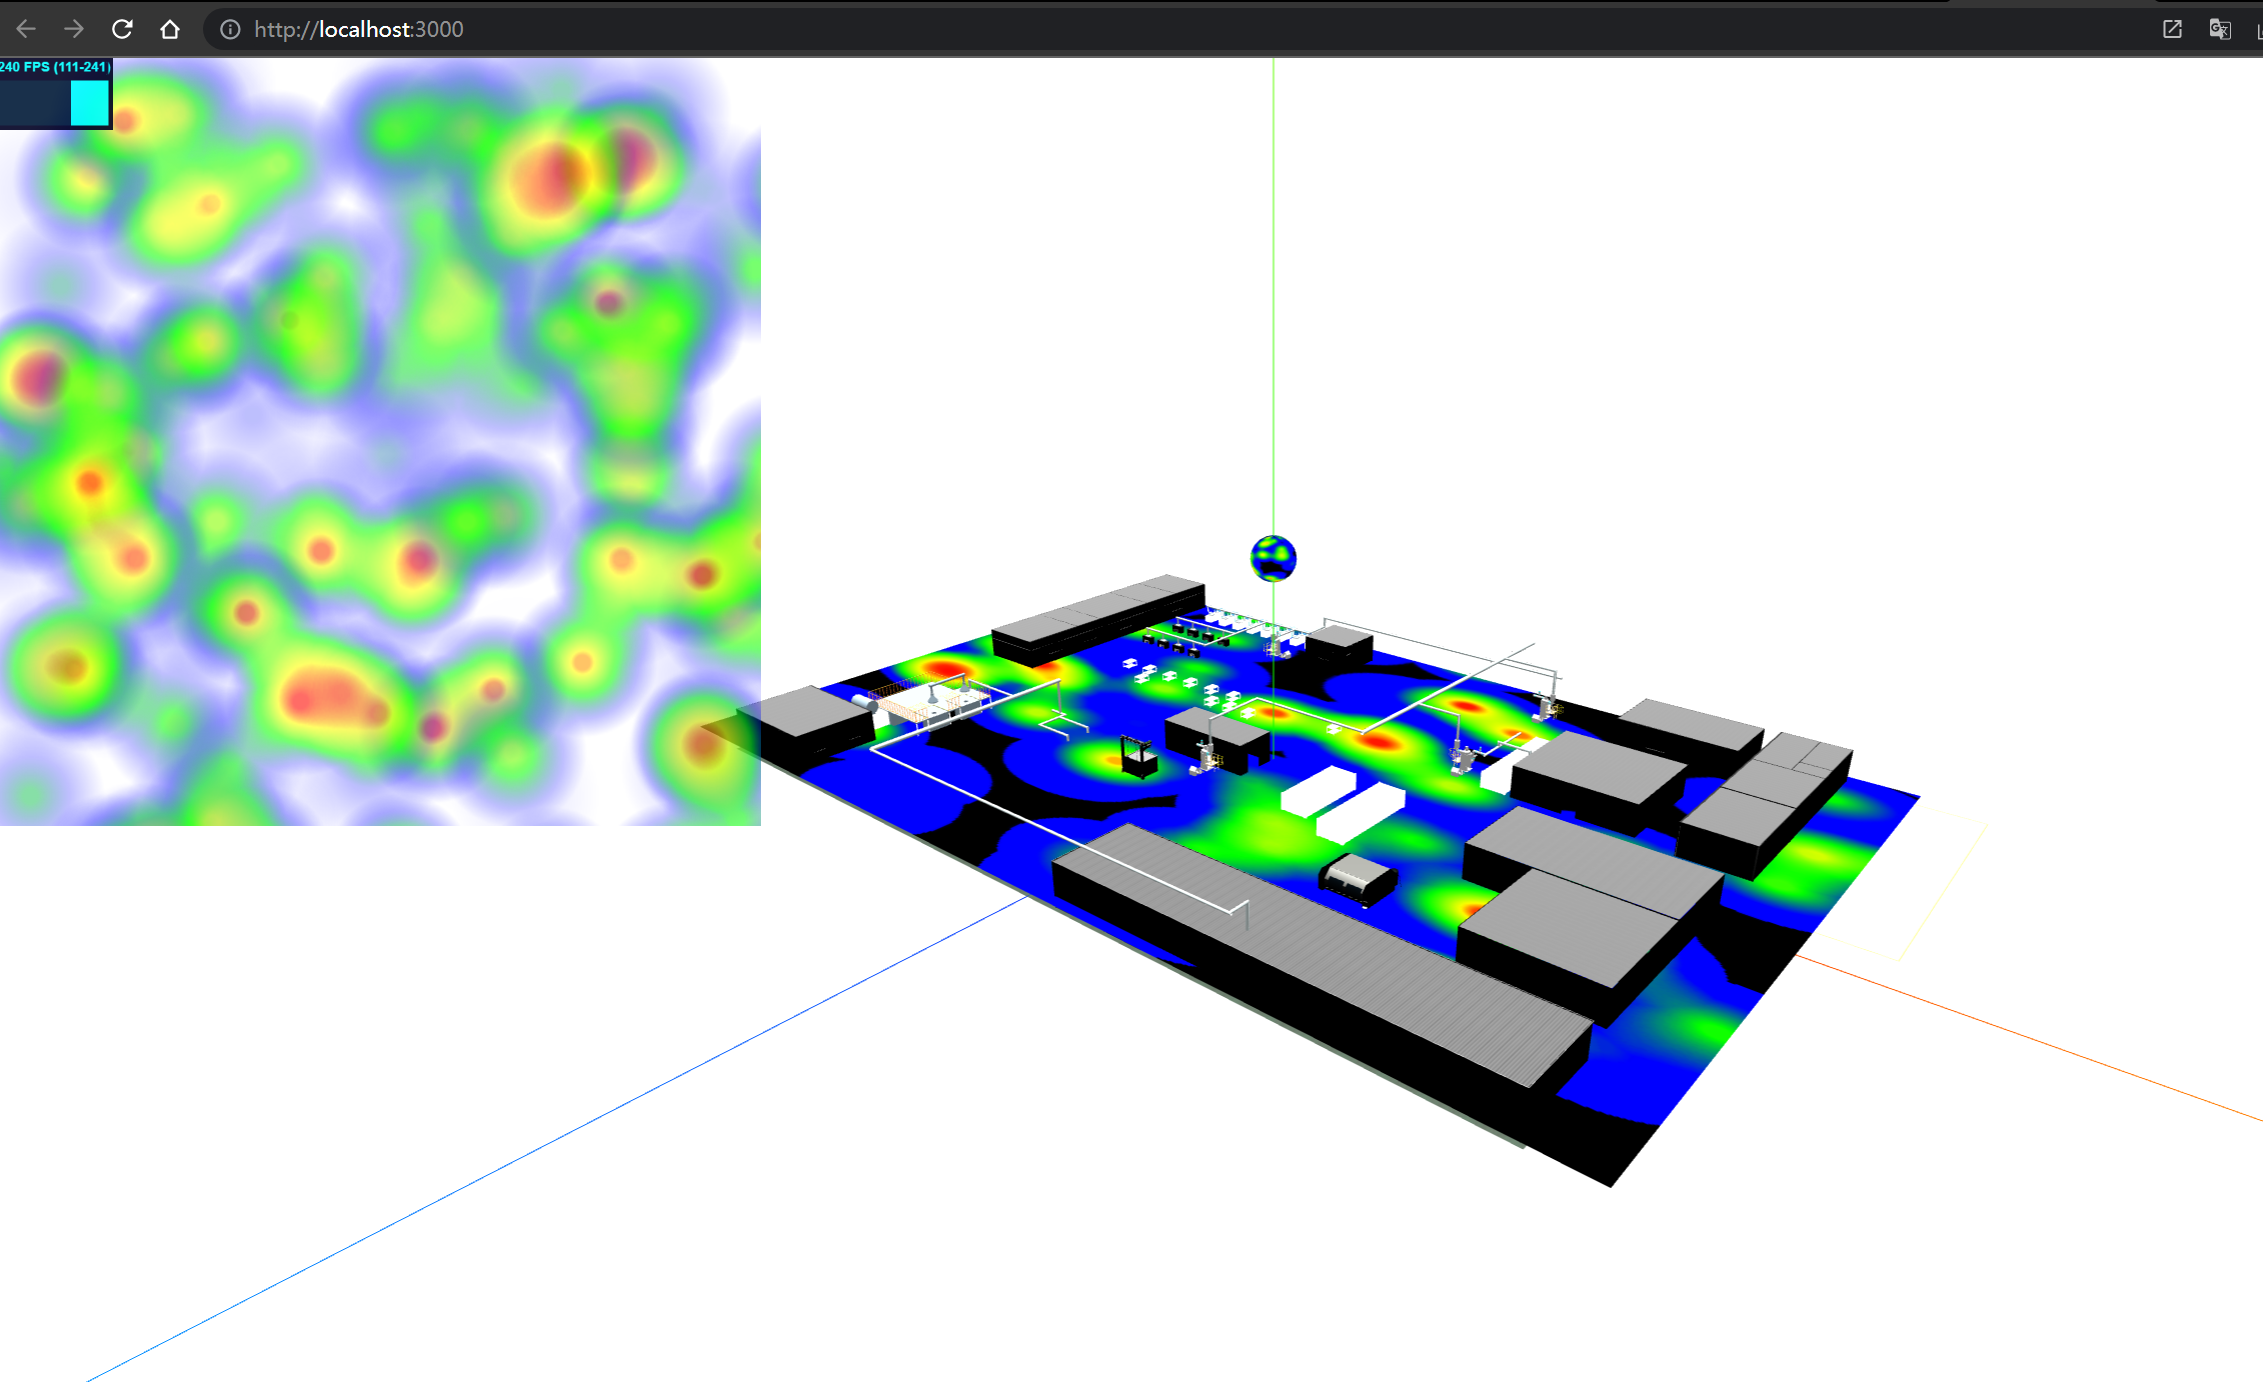
这个是我以前写过的一个案例,react 、 three.js 、heatmap-ts。希望能给到你灵感
完整代码如何:
import React, {

  useEffect,
} from "react";
import * as THREE from "three";
import { OrbitControls } from "three/examples/jsm/controls/OrbitControls";
import Stats from "stats.js"; //性能监控
import { GLTFLoader } from "three/examples/jsm/loaders/GLTFLoader"; //模型加载器
import { DRACOLoader } from "three/examples/jsm/loaders/DRACOLoader"; //模型解压缩


import WebGL from "three/examples/jsm//capabilities/WebGL.js";
// @ts-ignore

import HeatMap from "heatmap-ts";


if (WebGL.isWebGL2Available() === false) {
  document.body.appendChild(WebGL.getWebGL2ErrorMessage());
}

const width = window.innerWidth; //屏幕宽度
const height = window.innerHeight; //屏幕高度

// 渲染器
const renderer = new THREE.WebGLRenderer({
  antialias: true, //开启优化锯齿
});
renderer.setPixelRatio(window.devicePixelRatio); // 设置设备像素比。通常用于避免HiDPI设备上绘图模糊
renderer.setSize(width, height); // 将输出canvas的大小调整为(width, height)并考虑设备像素比,
// renderer.outputEncoding = THREE.sRGBEncoding; //定义渲染器的输出编码
// 相机
const camera = new THREE.PerspectiveCamera(
  60,
  window.innerWidth / window.innerHeight,
  0.1,
  1200
);
camera.position.set(50, 50, 90);
// 场景
const scene = new THREE.Scene();
scene.background= new THREE.Color('#fff');

// 轨道控制器
const controls = new OrbitControls(camera, renderer.domElement);
// controls.target.set(0, 12, 0);

// 性能监测 (这个不是three必须项)
const stats = new Stats(); // 性能监测
const loader = new GLTFLoader(); //gltf模型加载器

const dracoLoader = new DRACOLoader(); //模型解压缩
let rawshaderMaterial: any;
console.log("1111111111111111111", document.getElementById("view"));

const ReactDemo = () => {
  useEffect(() => {
    init();
  }, []);

  const init = () => {

   const heatMap =  handle_heatMap()
    // 定义高斯函数

    const container = document.createElement("div");
    document.body.appendChild(container);

    const axesHelper = new THREE.AxesHelper(90); // 辅助线
    scene.add(axesHelper);

    const textuerLoader = new THREE.TextureLoader();
    const texture11 = textuerLoader.load("./太阳.jpg");

    // 纹理加载
    const texture = new THREE.Texture(heatMap.renderer.canvas);
    // 这些常量定义了纹理贴图的 wrapS 和 wrapT 属性,定义了水平和垂直方向上纹理的包裹方式
    texture.wrapS = THREE.MirroredRepeatWrapping;
    texture.wrapT = THREE.MirroredRepeatWrapping;
    texture.mapping =THREE.CubeUVReflectionMapping;
    texture.repeat.set(1, 1 );
    texture.needsUpdate=true;


    const MeshBasicMaterial =  new THREE.MeshBasicMaterial( {
      map:texture
      } )
    //平面
    const floor = new THREE.Mesh(
      new THREE.PlaneGeometry(1, 1, 64, 64),
      MeshBasicMaterial
      // rawshaderMaterial
    );
    scene.add(floor);


    const light = new THREE.AmbientLight( 0x404040 ); // soft white light
    scene.add( light );


    const hemiLight = new THREE.HemisphereLight( 0xffffff, 0x444444 );
    hemiLight.position.set( 0, 1, 0 );
    scene.add( hemiLight );

    const dirLight = new THREE.DirectionalLight( 0xffffff );
    dirLight.position.set( 0, 1, 0 );
    scene.add( dirLight );
      // 模型


      dracoLoader.setDecoderPath('./draco');
      loader.setDRACOLoader(dracoLoader);


        // 获取模型的尺寸大小
        const box3 = new THREE.Box3() //表示三维空间中的一个轴对齐包围盒

        const v3 = new THREE.Vector3()
        box3.getSize(v3) //target — 如果指定了target ,结果将会被拷贝到target。返回包围盒的宽度,高度,和深度。
          console.log('size--------->', v3)


      const geometry = new THREE.SphereGeometry( 2, 32, 16 );
      const sphere = new THREE.Mesh( geometry, MeshBasicMaterial );
      sphere.position.y =20
      scene.add( sphere )


    // 性能监测
    container.appendChild(stats.dom);

    container.appendChild(renderer.domElement);

    window.addEventListener("resize", onWindowResize);
    renderer.domElement.addEventListener("click", handleModelClick);
  };

  function onWindowResize() {
    camera.aspect = width / height;
    camera.updateProjectionMatrix();

    renderer.setSize(width, height);
  }

  function handleModelClick(event: MouseEvent) {
    const raycaster = new THREE.Raycaster();
    const pointer = new THREE.Vector2();
    pointer.x = (event.clientX / width) * 2 - 1;
    pointer.y = -(event.clientY / height) * 2 + 1;
    // 通过摄像机和鼠标位置更新射线
    raycaster.setFromCamera(pointer, camera);

    // 计算物体和射线的焦点
    const intersects: any = raycaster.intersectObjects(scene.children);

    console.log(intersects);
  }

  function handle_heatMap(){
    const heatMap = new HeatMap({
      container: document.getElementById("view") as HTMLElement,
      // container: document.body,
      maxOpacity: 0.6,
      radius: 50,
      blur: 0.9,
    });
    let pointValue=[]
    let len =500;
    let max = 0
    while (len--) {
      var val = Math.floor(Math.random()*100);
      max = Math.max(max, val);
      var point = {
         x: Math.floor(Math.random()*width), //数据点的x坐标,一个数字
         y: Math.floor(Math.random()*height), //数据点的y坐标,一个数字
         value: val //数据点(x,y)处的值
     };
     pointValue.push(point);
  }
    heatMap.setData({
      max: 0,
      min: 0,
      data:pointValue,
    });

    return heatMap
  }

  //
  const timeClock = new THREE.Clock(); // 获取时间
  function animate() {
    requestAnimationFrame(animate);

    const time = timeClock.getElapsedTime();
    // if (rawshaderMaterial) {
    //   rawshaderMaterial.uniforms.uTime.value = time;
    // }

    renderer.render(scene, camera);
    controls.update();

    stats.update();
  }

  animate();

  return <div id="view" style={{opacity:1}}></div>;
};

export default ReactDemo;
如果你想在threejs实现热力图其实得写shader才可以,一般应用ShaderMaterialAPI在片元着色器里面可以实现,当然你需要传入相应热力图数据。此外也可以动态生成类热力图,但是需要实时计算梯度值,根据梯度值生成的数据区改变片元着色器颜色就可以。
我觉得上面作者回答的也不错,就是heatmap算是在这方面比较成熟的解决方案,可以借助第三方的应用去实现效果。官方地址https://www.patrick-wied.at/static/heatmapjs/
自己对threeJS不是很专业,就不班门弄斧了,抛砖迎玉,给一个demo例子,仅供参考。 至于地图的加载和坐标的匹配,甚至跟随放大缩小,动态改变热力图的解析度,还请threeJS大佬来完善.
代码具体地址是:http://www.icegl.cn/addons/cms/archives/showcode?id=148
感谢回答,想请教下shader怎么写或指导下思路,对shader了解的比较少,google和github没有找到解决办法,我现在的思路
1.先将散点数据加载出来
2.加载热力图纹理
3.根据点位取热力图的颜色值,这个我想每个点加权重值,根据权重值取颜色
4.目前每个点会有一个颜色,但是不知道怎么在地图缩放的时候重新取颜色值
非常感谢和期待您的再次回答
不好意思,刚看到。我仔细看了一下你的过程,思路是没有问题的,我再详细介绍下,希望对你有帮助。
1、散点数据你需要传输到顶点着色器里面,然后顶点也需要传输到片元里面。这个我想你应该能够理解。
2、根据权重值取颜色.
这块你需要用到texture2D函数。你可以从外面传输进来一个纹理,然后通过texture2D重新拾取纹理像素颜色。然后再更具你传进来的权重值,重新计算这个图片的颜色。比如举个例子哈。
float d = 1.0/lenght(uv)上面代码是简单的一个中间最亮两边逐渐变暗的函数,你就可以更具距离获取权重,你只需要在把你外面传输进来的值放到上面式子里就可以将你的权重参与进来。比如下面代码
float d = 1.0/lenght(权重)只是个简单例子,为了说明问题哈。
3、前每个点会有一个颜色,但是不知道怎么在地图缩放的时候重新取颜色值。
这个你直接监控鼠标事件就可以了呀,一般地图缩放是采用的滚轮事件
document.addEventListener('wheel', onDocumentMouseMove, false);你需要在这个onDocumentMouseMove函数里面判断地图的中心点和地图等级,进而判断是否需要更新。或者你不用判断,只要滚轮一动,就去更新数据,但这样效率低一些.
非常感谢解答